ASP.NET Web Forms
The Database Choice
Access has to be the most easy to use, yet feature rich database. It provides design view editors with wizards that enable developers to create complicated forms and reports with ease. Developers can also make many changes to the database tables without having to re-create the table. The only reason it is not used in web pages is that it can only support tens of users accessing the database simultaneously before its performance becomes unacceptably slow.
Therefore in the real world SQL Server is the Microsoft client-server database of choice. It is capable of supporting thousands of users simultaneously. However I am suggesting that Web Forms and Access provide the easiest and quickest route to creating web pages suitable for this project. You can use Access 2010 with the accdb file format or Access 2003 and the mdb file format.
Adding the Database
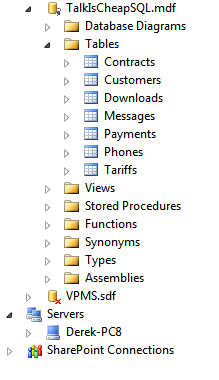
Right click on the App_Data folder and select Add Existing Item. Browse, find your database and click ok. The database should be added to the folder and should appear in the Server Explorer window as well. In that window you can examine the tables and update or view the data.
Adding a SqlDataSource
 The first step in using the data from the database in
a web page is to add an SqlDataSource component to the web page
and give it a descriptive name such as CustomersDataSource.
Switch into design view and select the context menu on
the top right hand corner of the component and select
Configure Data Source
The first step in using the data from the database in
a web page is to add an SqlDataSource component to the web page
and give it a descriptive name such as CustomersDataSource.
Switch into design view and select the context menu on
the top right hand corner of the component and select
Configure Data Source
Configuring DataSource
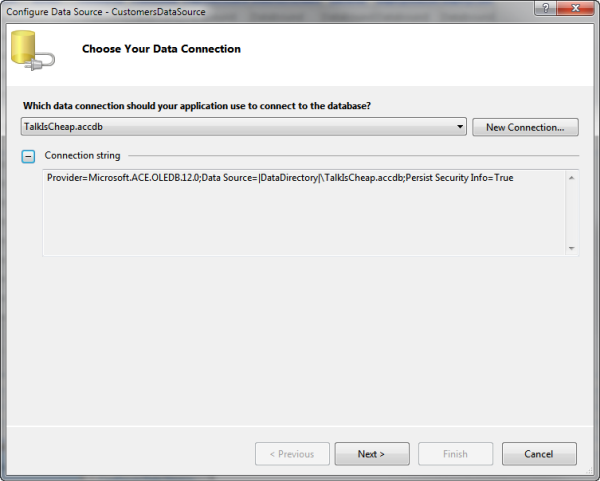
The dropdown list should contain the name of your database (TalkIsCheap.accdb) which can then be selected. If you expand the Connecxtion string you can see what is going to be added to your web.config file in order to connect to that database. Click Next. If the database does not appear in the DropDown list then create a new database connection
Connection String
If this is the first time you have connected to the database you will be prompted to save the connection in a connection string which could be named TalkIsCheapCoonectionString for example. The advantage of this is that next time you can select that connection string in the first dropdown list.

The Select Query
In the next page of the wizard select "Specify columns from a table or view" and then the required table. By default all the fields will be selected. However if only a few fields are required, the fields can individualy be selected.
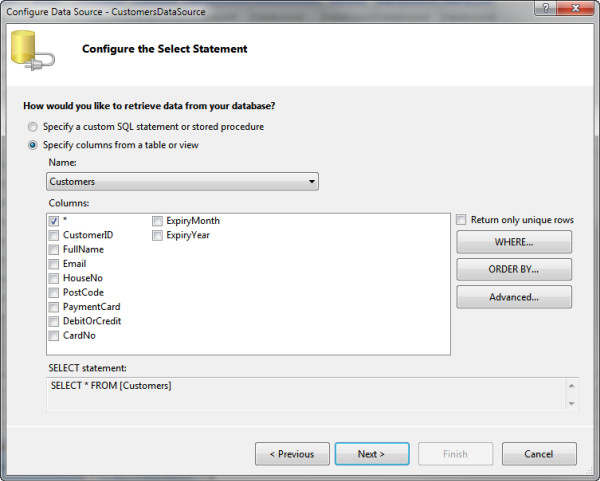
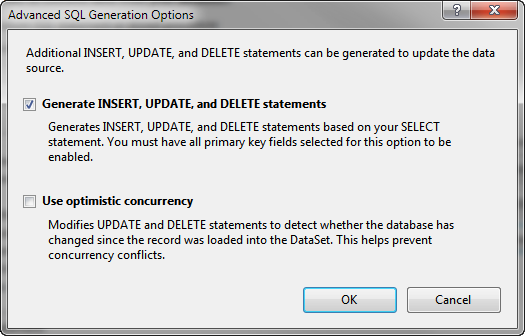
That is all that is needed if the web page is simply displaying data. If however you need to update, insert or delete data click the advanced tab and select generate INSERT, UPDATE and DELETE. This will generate the SQL needed to complete these operations. Optimistic Queries is not required as the database will not be used by multiple users simultaneously.
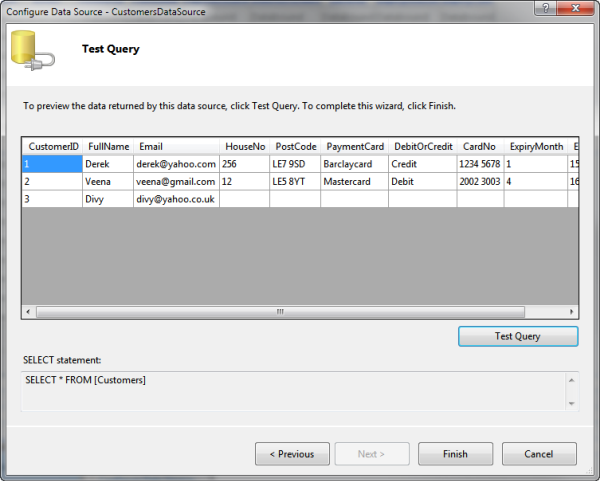
On the next stage of the wizard you can test the query to check it works before saving it by clicking Finish.