ASP.NET Web Forms
Data Validation: Required Fields
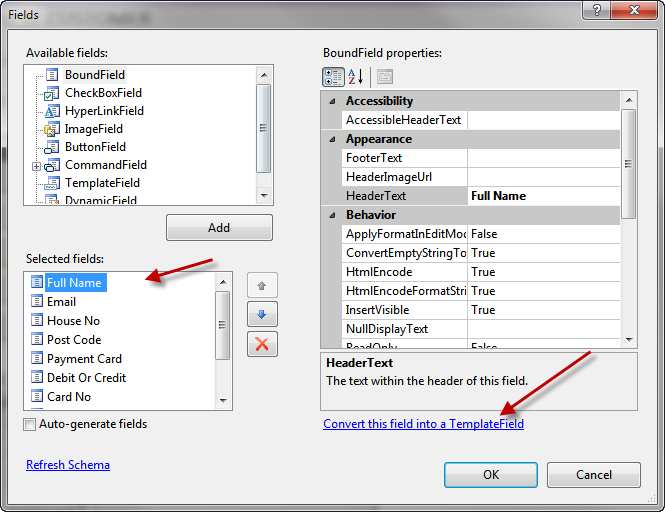
For data validation there are specific controls in the toolbox that can be added to each of the fields. By default the fields in a GridView and a DetailsView are BoundFields. To add data validation they need to be converted to TemplateFields. Select edit fields from the controls task menu, select the field to be converted and click "Convert to Template Fields.
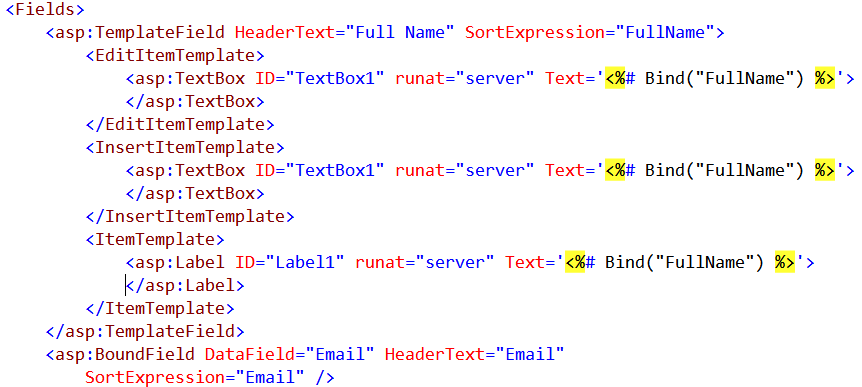
A Template field contains templates for Edit, Insert and Item. The Item template is used for displaying the field as opposed to editing existing bound values or inserting new bound values. The names of text boxes and labels (e.g. TextBox1) can be changed in the usual way to more meaningful names. Notice it is possible to have two textboxes with the same name as only one is used at any one point in time. You can if you wish differentiate them by calling them EditNameTextBox,or InsertNameTextBox, or just NameTextBox.
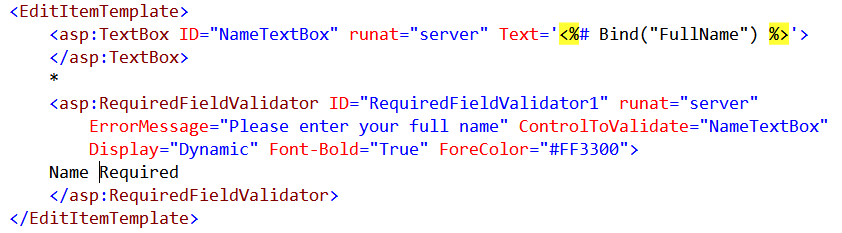
Data validations such as RequiredFieldValidator can now be dragged and dropped in code view or design view. In design view select Edit Templates, select the template required and then drag and drop the control. The controls properties can then be changed, in particular ControlToValidate must be set to the name of the appropriate TextBox. Styling can be applied best using a cssClass. HTML or text can just be added in code view. The example below shows a required field with validation and an * to indicate it is a required field, and a message (Name Required) that will be displayed if the field is left blank. The larger error message can be displayed using a ValidationSummary control (see below).
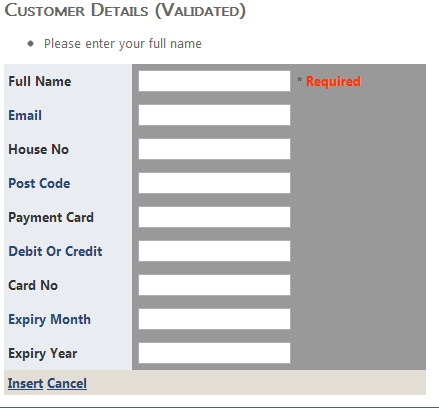
The Insert Template can be validated by copying and pasting the code from the edit template. To provide fuller error messages drag and drop a ValidationSummary just above the DetailsView. Test the validation out by running the page selecting New, leaving the field blank and clicking Insert. You should then see something like shown below:-
Data Validation: RangeValidator
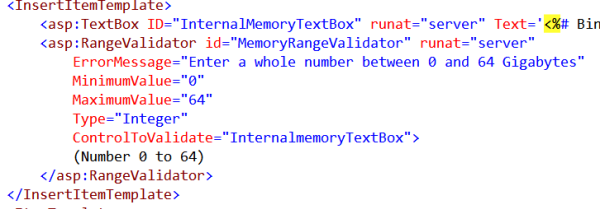
As well as required fields, some fields require additional checks such as checking that the value is inside a particular range of values. This can be accomplished by adding a RangeValidator to a Template Field in code view or design view as explained for the RequiredValidator. The properties that need to be set are ControlToValidate, Type, MaximumValue, MinimumValue. These can be set in code view or design view.
Compare Validator
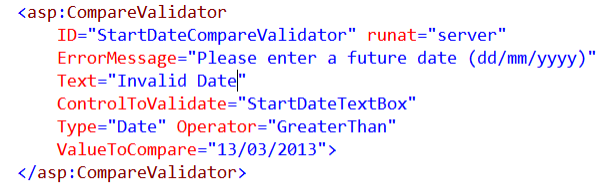
The CompareValidator can be used to check that a value is the correct data type such as Date. It can also be used to compare the value of the field with the value of another field. So, for example you, you could check that the date the the order was dispatched was after the date the order was placed. In the example below the data is checked against a fixed value
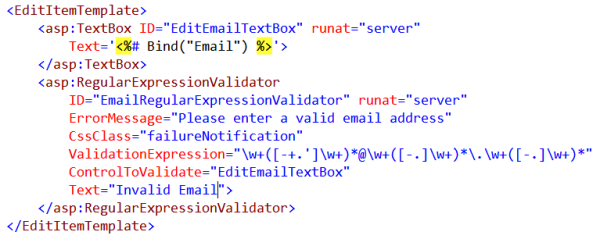
Regular Expression Validator
One of the most flexible validators is the regular expression validator. They are compatible with JavaScript Regular Expressions . A simple format of two letters follwed by 3 digits would be [A-Z]{2}[0-9]{3}. The easiest way is to edit the template field in design view and select a preset expression form the drop down list in the ValidationExpresssion property. Unfortunately there are only two useful ones there, email addresses and urls. There is however a usefull css class that can be used to style the error message in red.