ASP.NET Web Forms
Starting a Web Forms Project
Using Visual Studio select File -> New -> Project, and select C# Web and an ASP.NET Web Application. Make sure that the Location is a folder you can easily find on your hard drive or memory stick (something like C:\Websites\ApplicationName). Call the project something like WinesWebsite. Please note spaces are not allowed in names, use capital letters at the start of each word. Make sure that you have chosen the appropriate language C# or VB

In Visual Studio you can also create web sites, however they also use a hidden solution file, and when the folder is moved from home to college it can cause problems. Projects on the other hand have a project file and a solution file all in one folder, so moving the folder causes less problems.
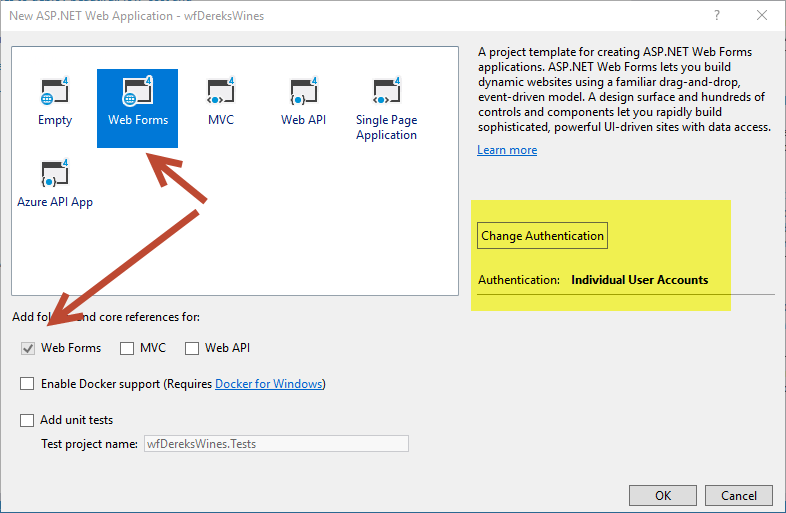
On clicking ok, the next dialog allows you to select whether the project is based on the Web Forms template or other templates such as MVC. By default, in Visual Studio 2017, no authentication is selected, but this can be changed usually to Individual User Accounts to allow secure pages which only limited people can access.
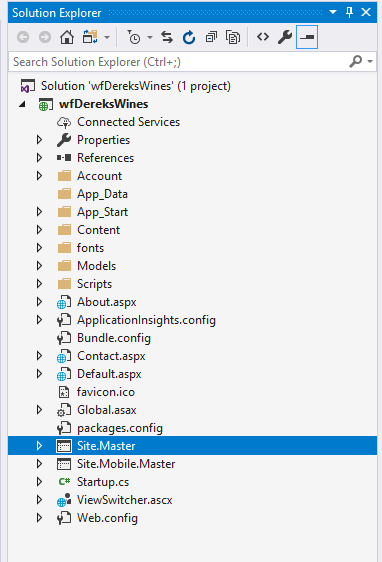
An Asp.Net Web Application contains a complete web site well structured with folders for the database, Scripts (JavaScript files, such as jQuery and Bootstrap), and a Content folder for your cascading style sheets. Just add an Images folder, and folders for the Client and Admin web pages.
The biggest advantage of using this as a starting point is that it contains a system for user logins, registrations and password changes. The web pages are stored in the Account folder. PLEASE DO NOT REGISTER A USER UNTIL YOU HAVE CONFIGURED THE DATABASE AS OUTLINED IN THE Web.Config WEB PAGE. As soon as you register your first user an SQL Server Database is created that cannot be easily modified later.
Another advantage is that this project uses a Site.Master web page which is a template used by all other web pages in the web site. It contains the web site header, footer and navigation system which is best kept the same for each web page. The other web pages sit inside the master page in content regions. To add new menu entries to your web site modify the master page.
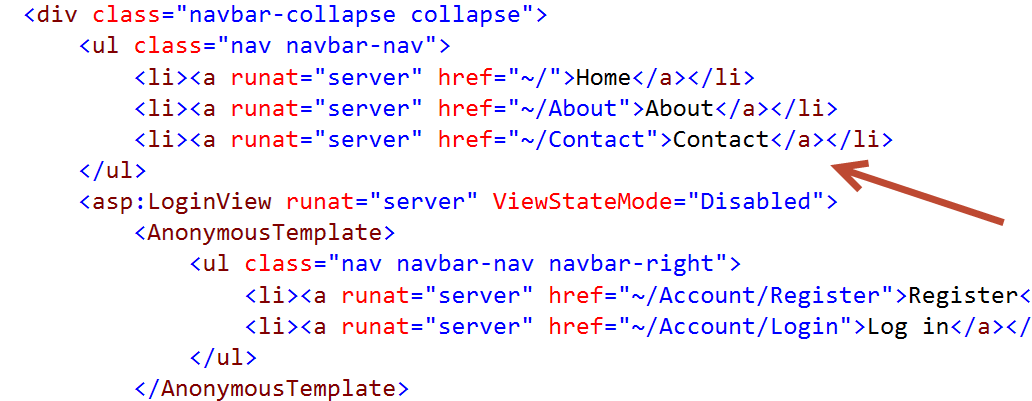
Two new menu items have been added to the standard menu, one called Grapes, and one called Regions in this example.

Two new web forms then need to be added to the project by selecting Project -> Add New Item and selecting Web Form with Master Page and naming the file appropriately.
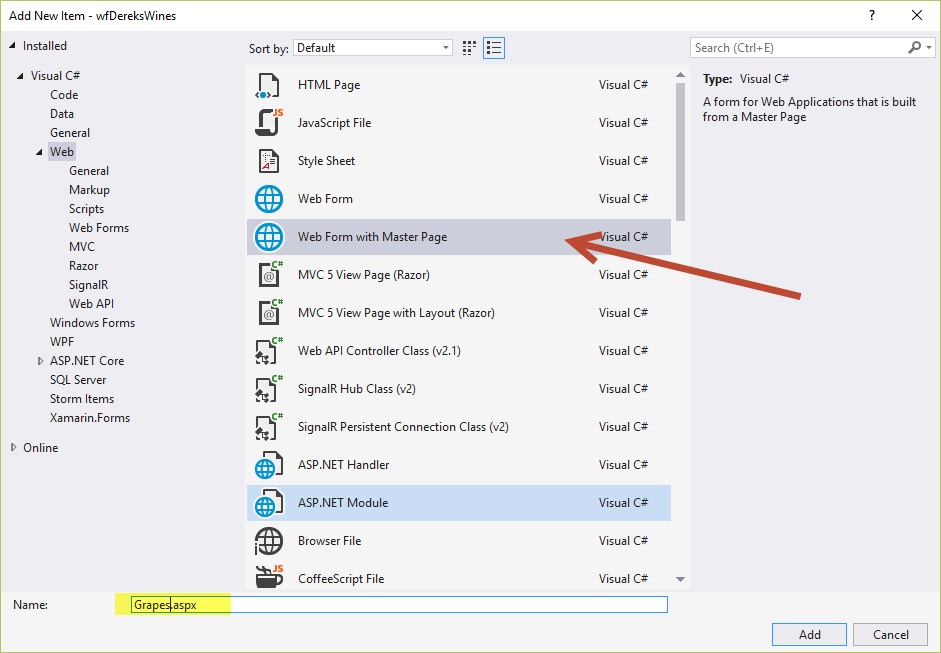
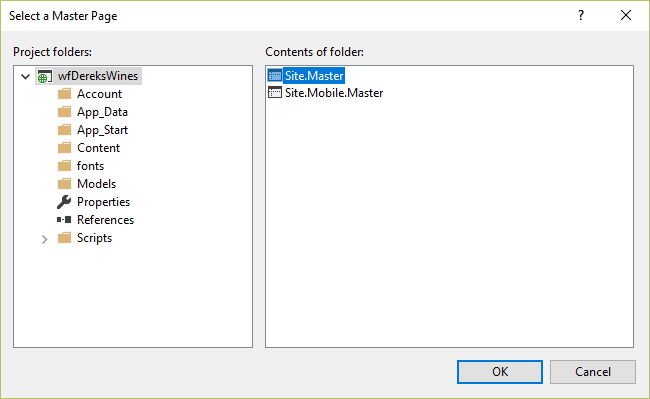
Then select the Site.Master as the attached master file.
